
Creating a website is actually easier than you may think, with the right tools and systems you can get your website live within few hours without any prior coding skills/knowledge.
All you need is a computer with a steady internet connection.
In this step-by-guide, I want to show you exactly what you need to develop a website from scratch, by the end of this article you'll have learnt how to build an exclusive website.
Tools needed to build your website
- Domain name (your custom web address, www.yoursite.com)
- Website hosting (service that hosts your website)
- WordPress (free, commonly used website platform)
To build a fully functional website, you’ll need to secure a domain name (web address) and a web hosting account. These two make sure that your website is fully accessible to others. because without one or another, you will be unable to set up a website.
Once you have a domain and hosting, you can create a WordPress website.
What is WordPress?
WordPress is a free and open-source content management system written in PHP and paired with a MySQL or MariaDB database. Features include a plugin architecture and a template system, referred to within WordPress as Themes.
WordPress is the most popular website building platform that is being used by over 36% of all the websites on the Internet.
Setting up a WordPress site is usually a simple, one-click process through your web hosting service.
Are you ready? Let’s get down to business.
Table of contents (steps to launch a website):
- Choose a domain name
- Register a domain and sign up with web hosting
- Set up a website using WordPress (through web host)
- Choose a theme for your site and customize design structure
- Install Elementor page builder
- Import a template that matches your business
- Customize & Personalize Your WordPress Website
- Update your WordPress Settings
- Update your Menus & Widgets
- Install Plugins
Step #1: Choose a Domain Name
In order to build a website, the very first thing you’ll need is a domain name.
The domain name is your website name and address. That address is used by visitors when they try to find your site through their web browsers.
Your domain name is the anchor that defines your brand. You’ll add this to all your marketing materials, including your email signature, for maximum exposure.
There are many types of domain extensions (also called TLDs, or top level domains) such as .com, .org, and .net. Those three basic TLDs are still the most recognized, but you might also consider others like .travel, .mobile, or .coffee. You can also consider protecting your name or brand by registering multiple names that point to the same website, called “parking.”
Best Practice: Choose domain name that’s as short as possible, that reflects your business or brand, and probably a .com (they’re still the gold standard).
Domain names can cost anywhere from $10 to $50 a year. The usual price tag is around $15.
Don’t worry if your preferred domain name is already taken. There are more than 300 million different domain names registered, but there are a billion other possibilities that are still available.
Step #2: Get Web Hosting and Register Domain
A good web hosting service is what makes your website (it’s content, pages, images, etc) accessible to your users on the WorldWideWeb.
All your website data and information are stored in the hosting provider’s servers, and every time a user sees or searches something on your website – it is routed from service providers servers to visitors’ browser tab.
There are many players to choose from depending on your needs. Here is just a small list:
- Namecheap
- Siteground
- BlueHost
- HostGator
- Hostinger
- GoDaddy
- TsoHost
Whichever web hosting company you sign up with, make sure it has the following features:
- FREE domain name with SSL (for security)
- One-click-install for WordPress (free)
- Custom email accounts
- Unlimited or unmetered bandwidth (no traffic limitations)
- Customer support, preferably 24/7 live chat
If you find a website hosting that offers all of the things above, you’ve likely found a good provider.
We recommend Namecheap as they provide top performance and keep your websites secure with advanced approaches. They have amazing customer support that can help you through every step.
2. Choose the service/package you require.


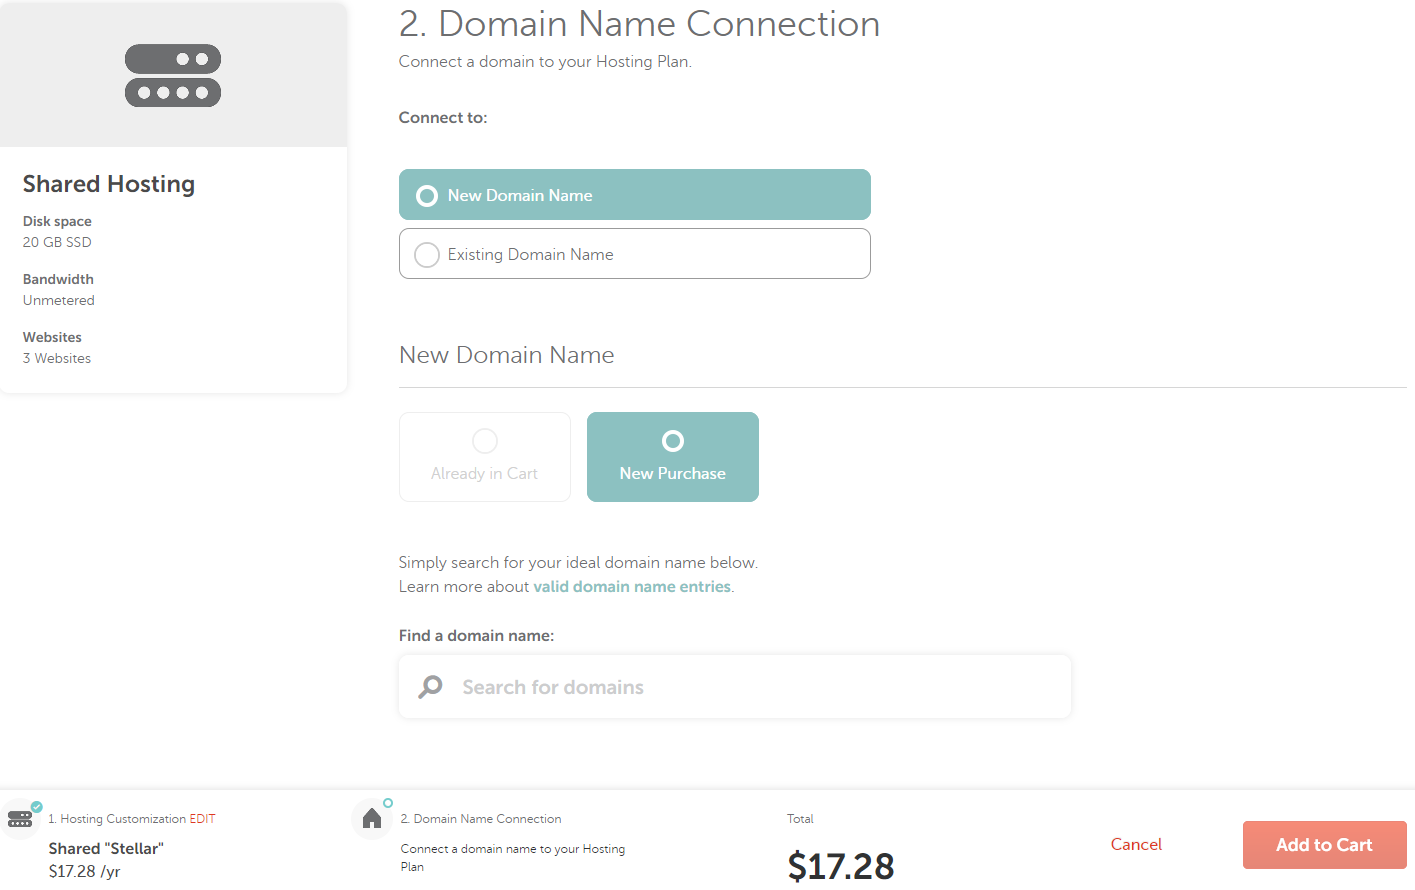
If you choose the New Purchase option, the domain selection will be within one page.
Type the domain into the Search field and then select one of the offered domains or click View All TLDs to select one of them.
4. Click Connect To Hosting to proceed:


6. On the next step, you can review your order details and apply a coupon if you have one. Click on Confirm Order to proceed to the checkout:

7. Once done, choose the payment method for your hosting package. You can choose one of three payment methods – Credit Card, Paypal or Account Funds:

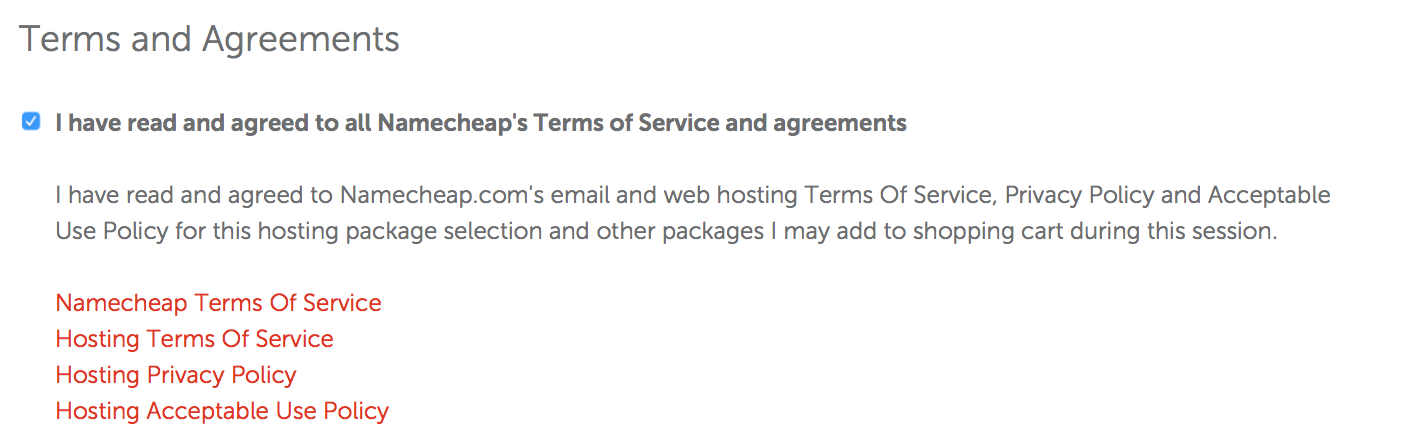
8. On the next page, you will see the final order listing and will need to agree to our Terms and Agreements. When ready, click on Pay Now:
A Shared hosting account is usually activated instantly, however, in some cases it might take up to an hour.
Step #3: Set Up WordPress Website (Through Web Host)
Once you order hosting service, you can start creating your own website. Using Softaculous automatic app installer you can install WordPress in a few clicks.
Below you can find step-by-step guidelines covering the process:
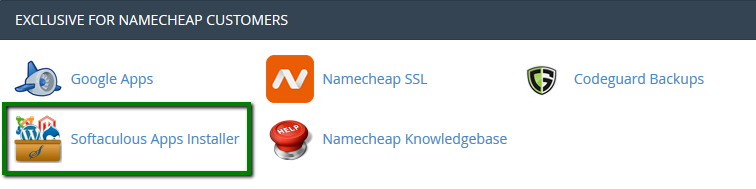
1. Log into your cPanel.
2. Navigate to Exclusive for Namecheap customers section > Softaculous Apps Installer menu:
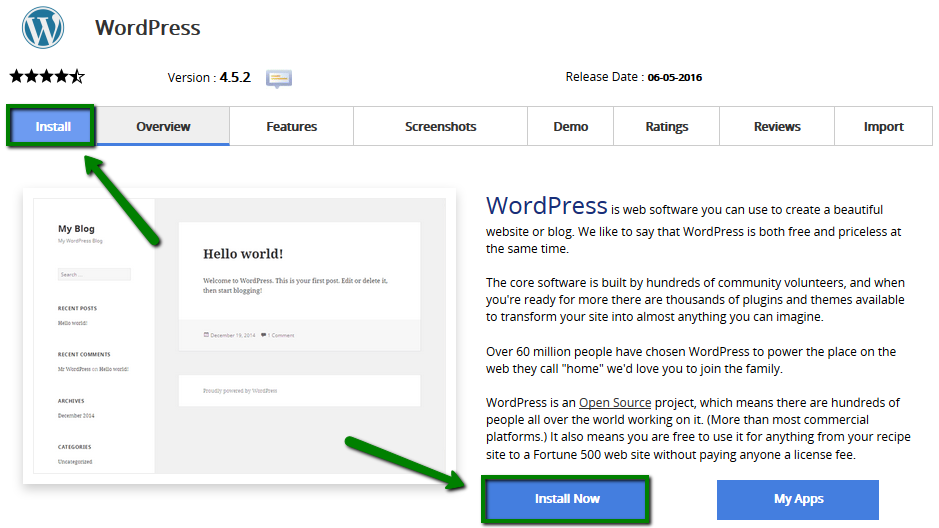
3. On the homepage, click on the WordPress icon:
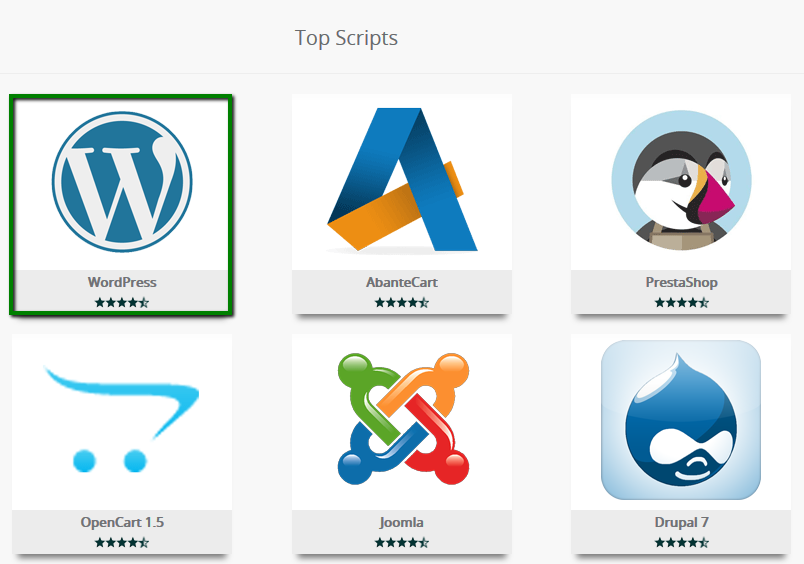
4. Switch to the Install tab to proceed:
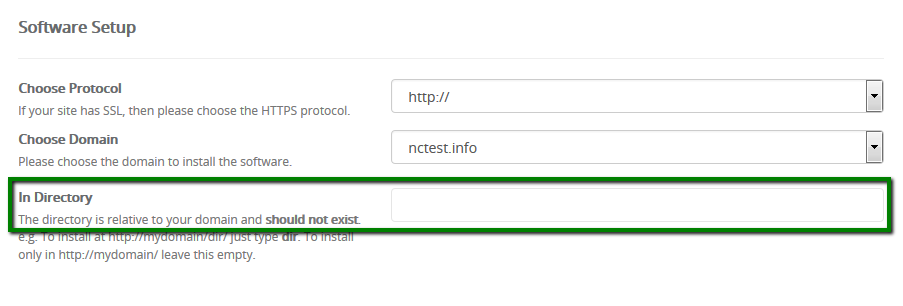
5. On the next page you will need to fill out the details of your WordPress installation.
- Choose the domain you wish to install WordPress for
- In the In Directory field you can specify the root folder for WordPress installation. By default, this field is empty, and it allows installing WordPress on yourdomain.com directly. If you wish to install it to a subfolder, like yourdomain.com/blog, simply type "blog" in this field.
- Database Name can be left default.
- Table Prefix can also be left default wp_; however, due to security reasons it is better to change it, e.g., to ncwpsite_ .
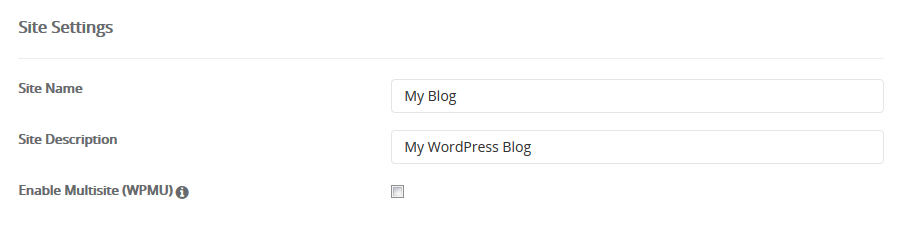
- The Site Settings section should be filled out accordingly to your needs, though you can change it anytime later if required.
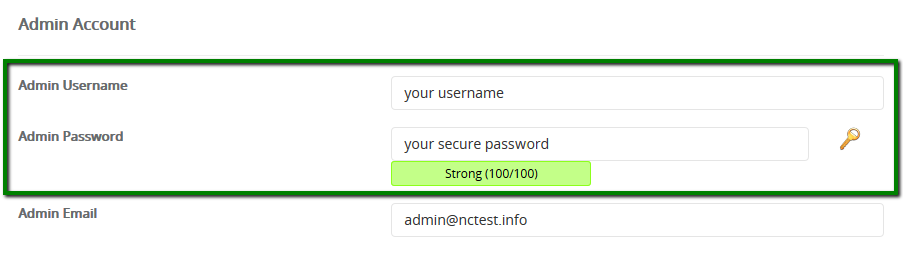
Make sure you set up secure and hard-to guess details in the Admin Account section:
6. When ready, scroll down and hit Install.
In a few moments you will see the message that WordPress has been successfully installed:
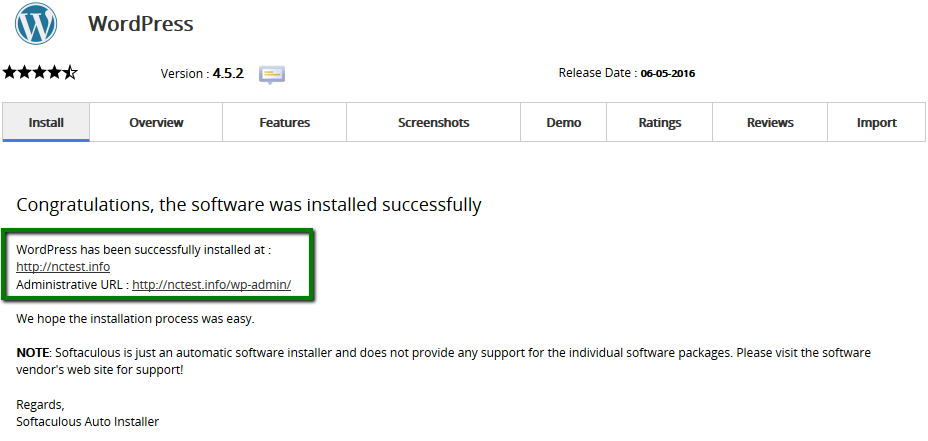
You can now go ahead and log into your WordPress Dashboard to start working on your website
Step #4: Choose a theme for your site and customize design structure
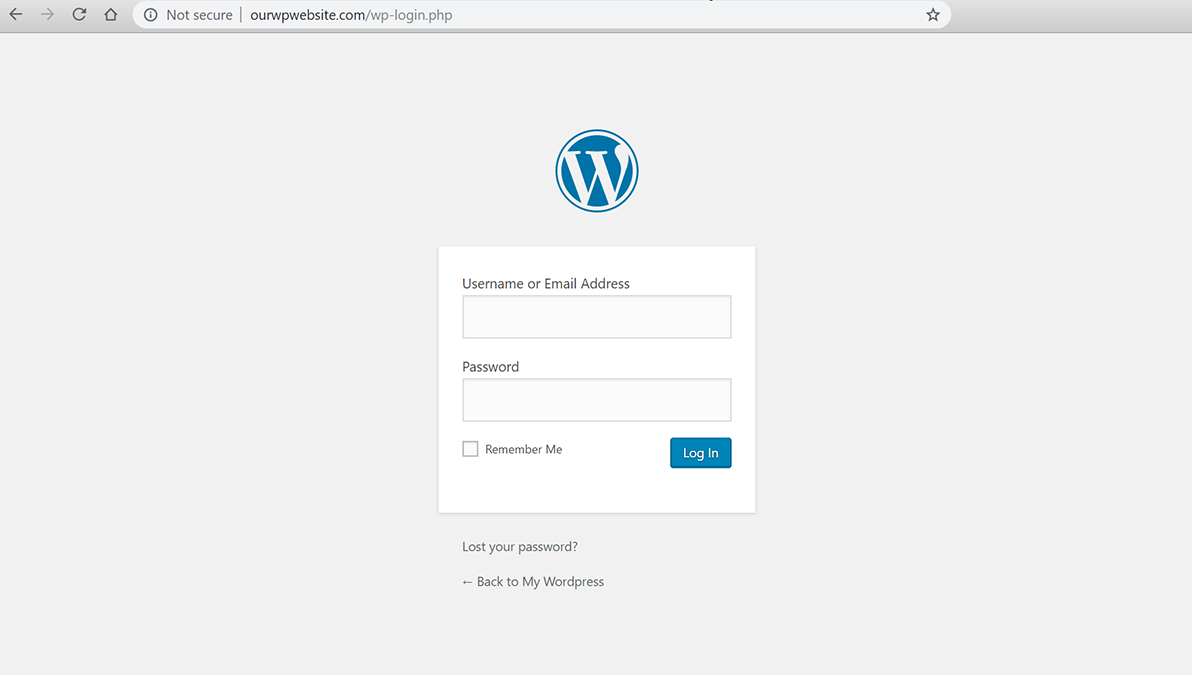
It will take you to a login screen that looks like this.
Use the username and password you used during the NameCheap installation process.
What is a WordPress Theme?
A WordPress theme changes the design of your website, often including its layout. Changing your theme changes how your site looks on the front-end, i.e. what a visitor sees when they browse to your site on the web. There are thousands of free WordPress.
A WordPress theme allows you to customize and personalize how your site looks and feels based on your requirements and branding guidelines.
With the help of a theme – you are able to customize the layout, structure, colors, appearance of your website.
Free Themes vs Paid Themes
If you need basic functionality on your website, then you would go with a free theme.
For example, if you are a solopreneur and you are using your website just to showcase your brand – a free theme would accomplish most of your needs.
However, there are limitations in terms of what you can change or update.
Hence there are paid themes.
They offer more personalization, customization and additional functionality over free themes.
There are over 10000+ themes available in the WordPress ecosystem to choose from.
The average price of a paid theme varies anywhere from $40 to $60 depending on the vendors and options.
Where to Find a Theme That Suits You?
You can start with WordPress.org and search for many options.
Login into your WordPress Dashboard.
Click on Appearance, and then on Themes.
You will notice some options there, and also the ability to search for other themes as well.
You also have the option to upload a theme

I recommend using Astra theme, because of the raving review they have received from their customers, and I can testify that it's one of the best theme on WordPress.
With over 1,000,000 + WordPress websites that have installed Astra – I can confidently say that it will work for you as well. Check out our listing on WordPress.org that showcases 1,000,000+ installation and 4435 5-star reviews.
Install the Astra WordPress Theme
Head over to your WordPress Dashboard.
Click on Appearance, then Themes, then Add New
Then, search for “Astra” and click the Install & Preview button.
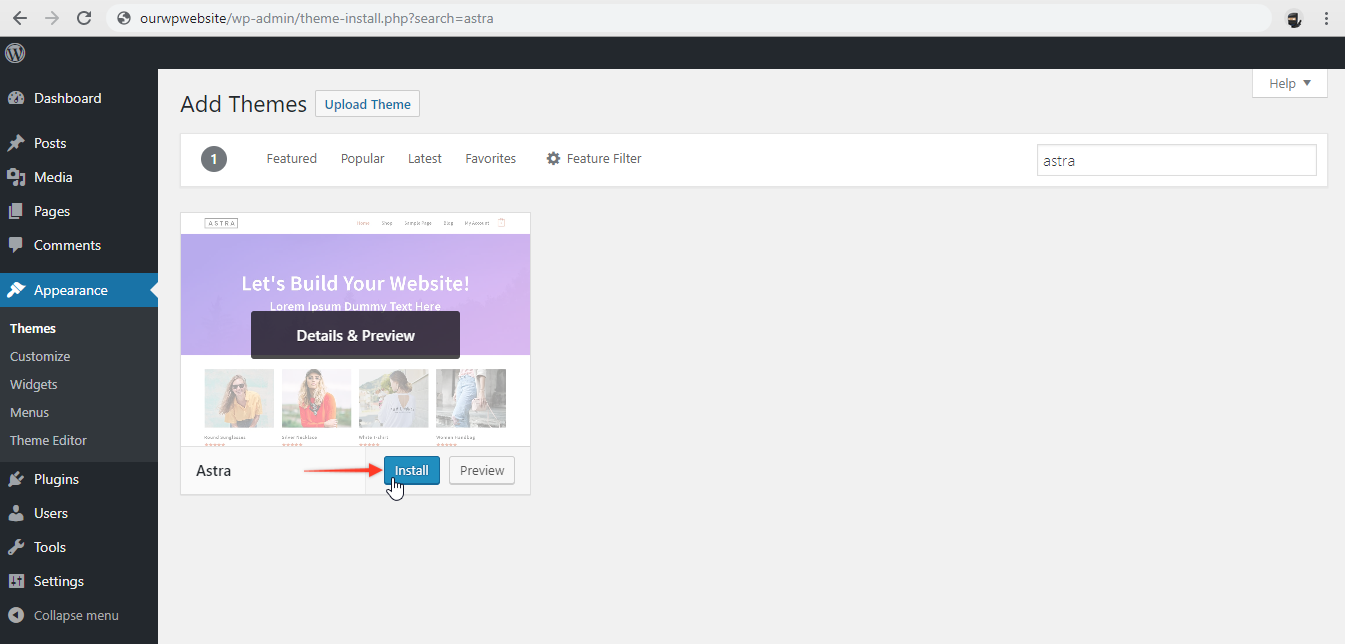
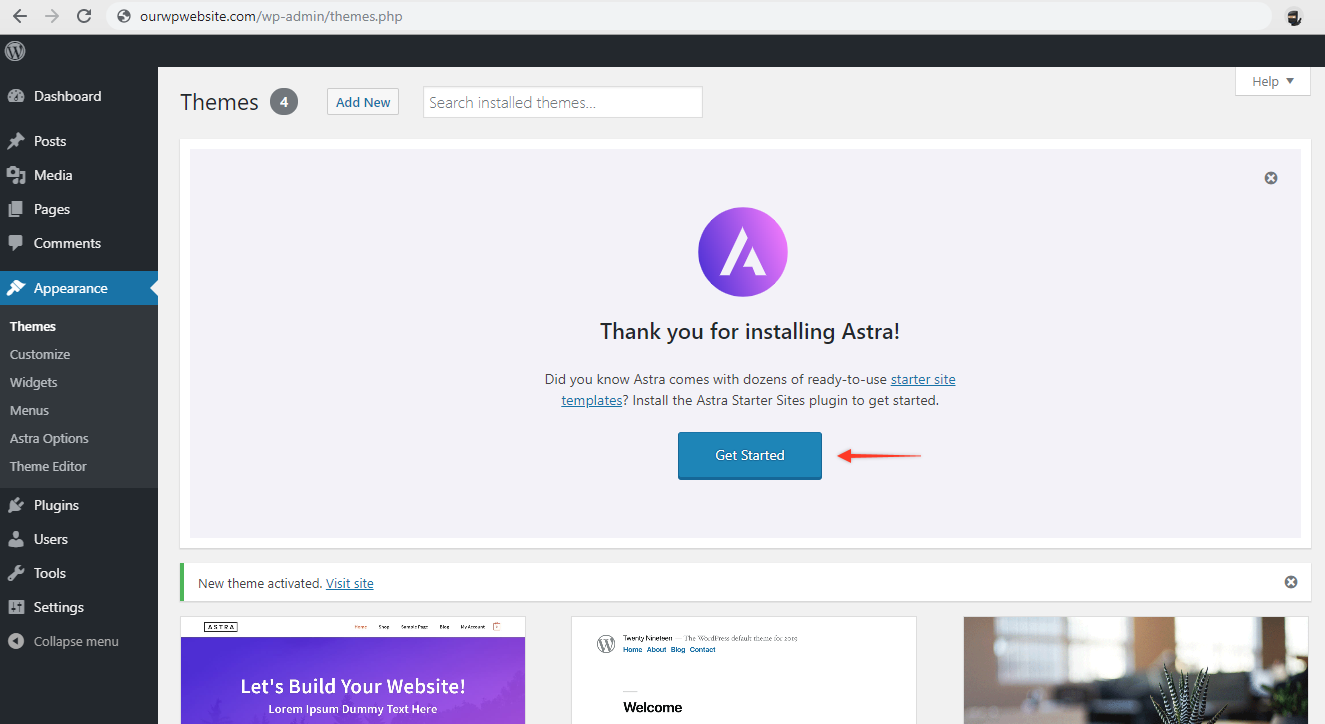
In less than a minute, the Astra will be installed.

Next – click on the “Get Started” button.
Step #5:Install Elementor page builder
You will notice this screen where it shows you the different options to choose a Page Builder.
We are going to choose the Elementor Website Builder(Page Builder) from the list below.
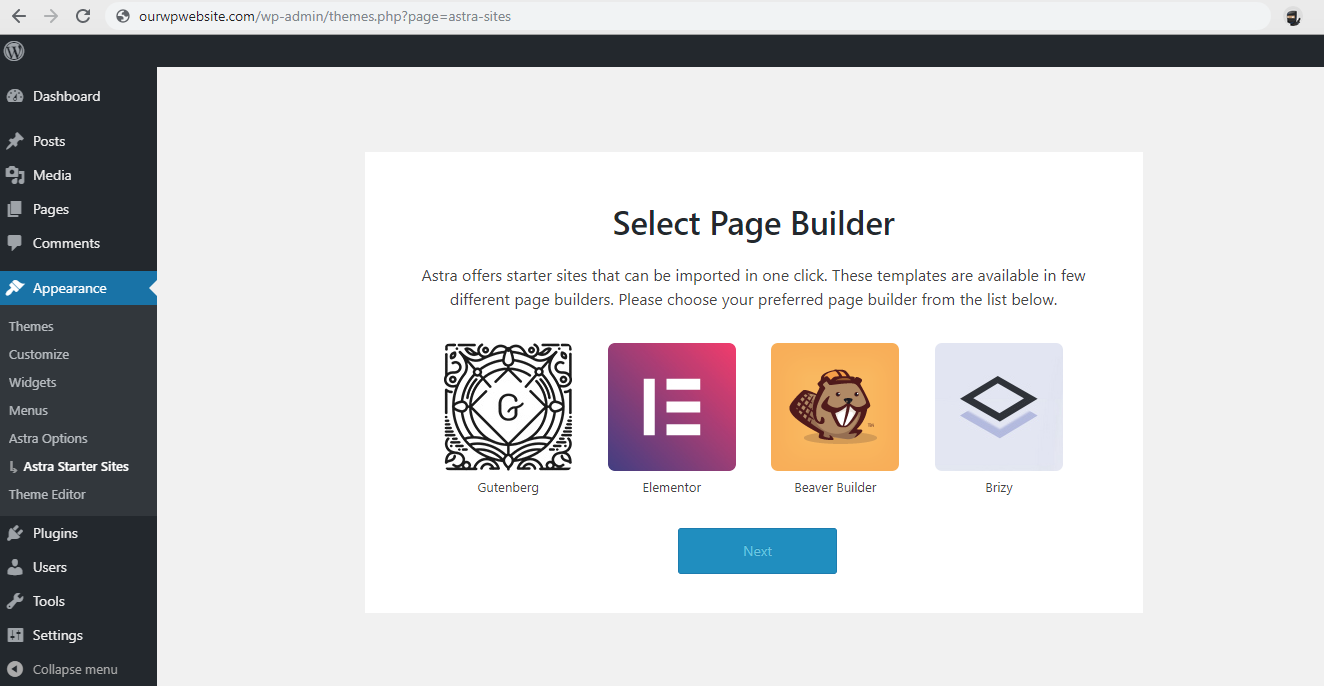
In less than 2 minutes, the Elementor Website Builder will be installed.
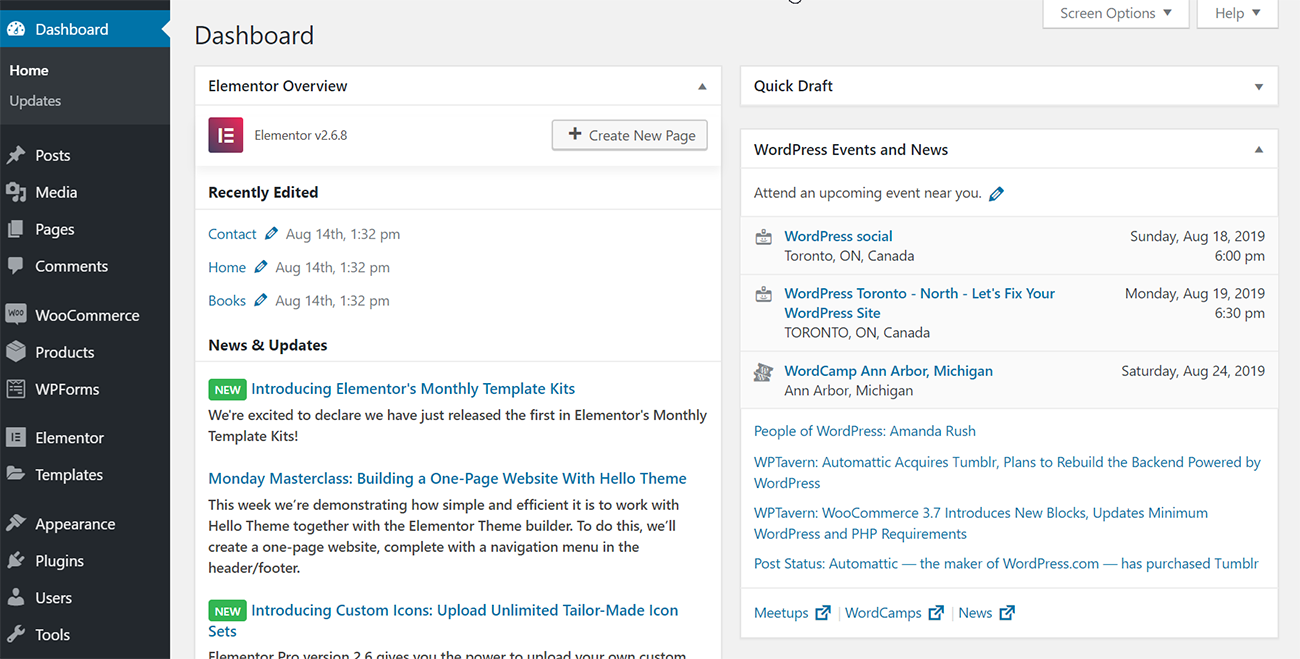
Once installed go back to your WordPress Dashboard.
Under Appearance, you will now see a few more options:
- Astra Options
- Starter Templates
Choose the Starter Templates, and you will see a library of 100+ templates you can choose from.
Step #6: Import a template that matches your business
For this article, I am going to choose one of the Free Starter Site – the Life Coach template.
In less than 30 seconds, the Starter Site will be imported and setup.

This is how your WordPress Dashboard will look once the Starter Site is imported.
At this point, this is how the live website will look like.

This is just a template, and we need to make it look like your website.
I will cover that in length in the next section of this guide.
Step #7: Customize & Personalize Your WordPress Website
The benefits of WordPress is that you don’t need to learn coding to create a website.
Even if you are a non-techie – you are able to get up and running with a new website very quickly, 500+ new websites are created every day using WordPress.
With the help of Starter Templates – we will show you how can do that even faster.
In this section – i will show you how to customize your WordPress website that’s consistent with your branding and style guidelines (all without having to type a single line of HTML/CSS code).
Head over to your WordPress Dashboard.
Click on Appearance, and then Customize.
This will open the Customizer and this how the default Customizer looks like
I can imagine how confusing it can be especially if this is your very first attempt at WordPress.
To make it simpler – you can use the Astra customizer
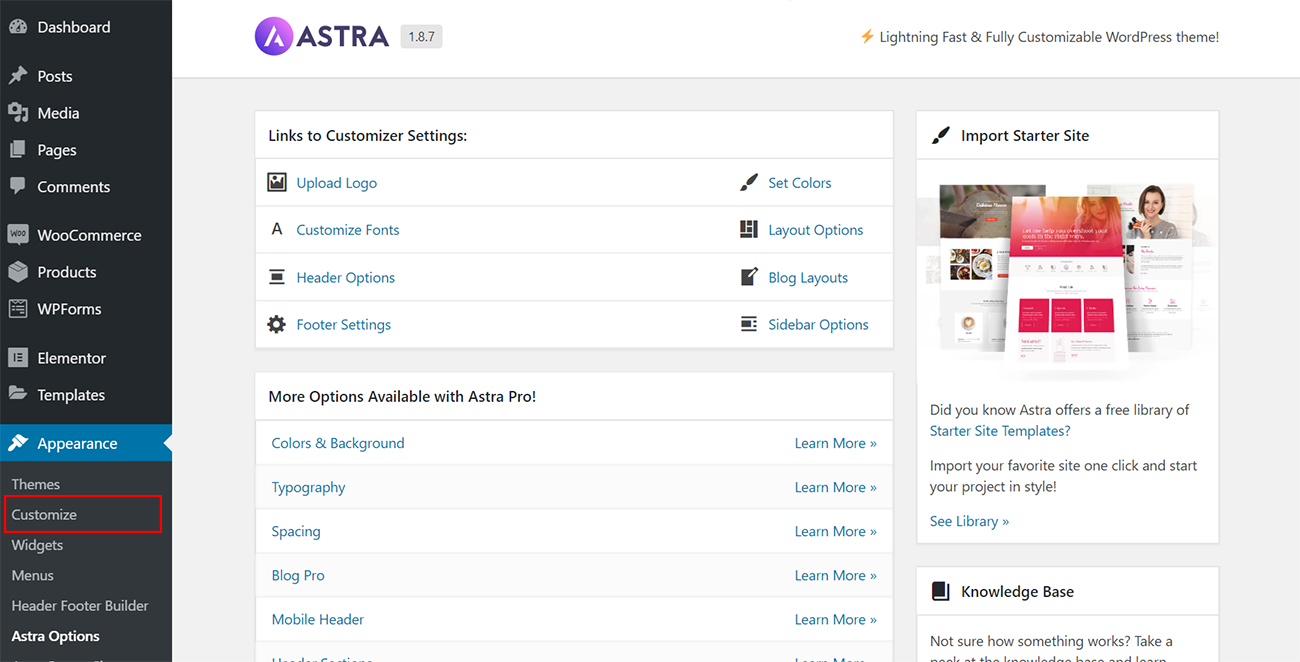
Head over to your WordPress Dashboard.
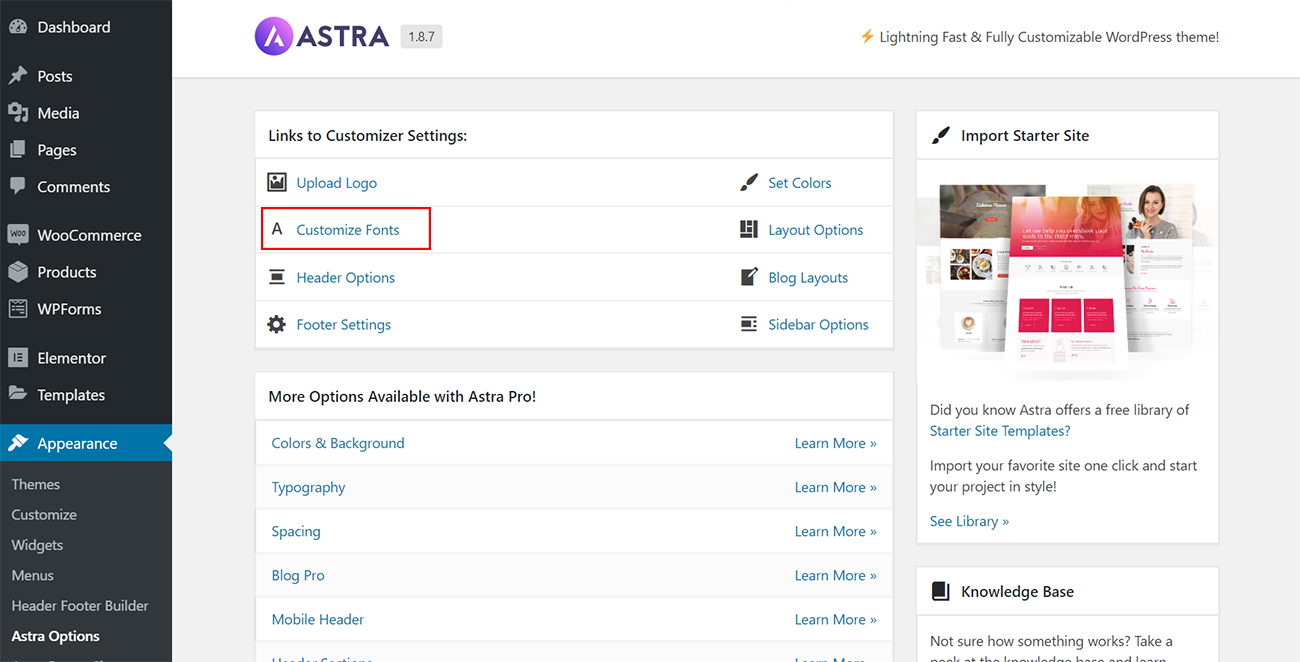
Under Appearance – choose Astra Options.
You will see this page that shows all the shortcuts, and you can pick and choose what to customize.
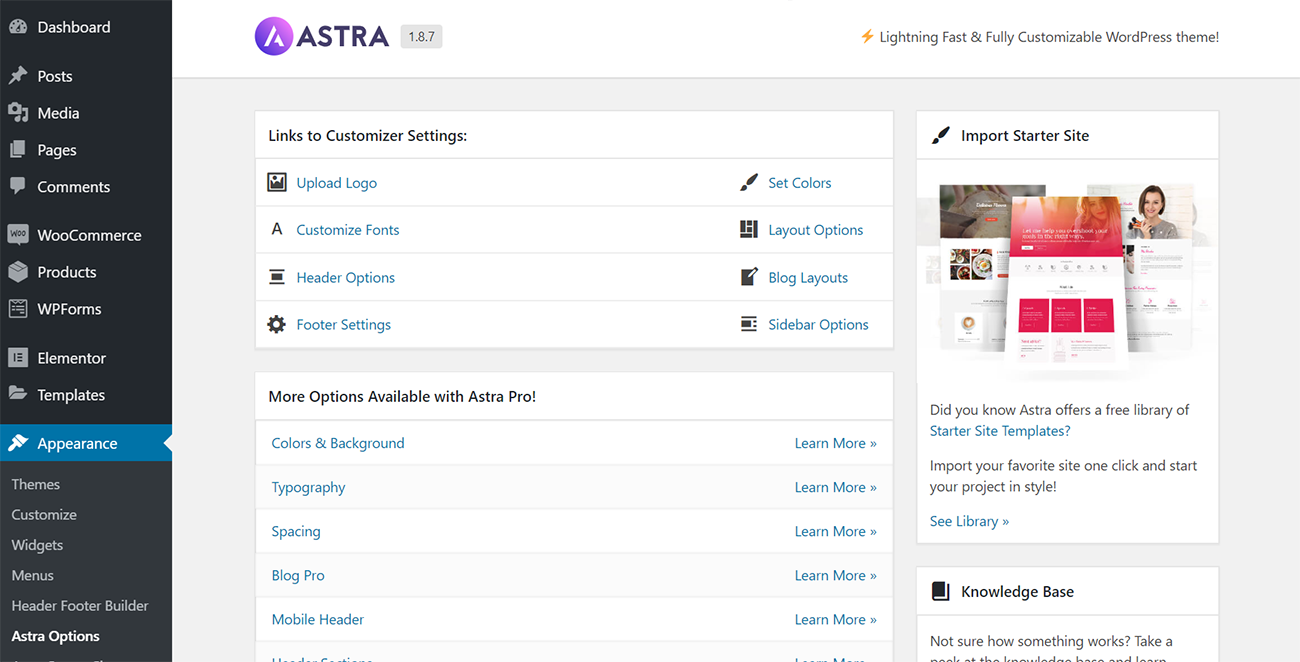
In the next few minutes, we will discuss how to update the following using Astra Options:
- Update Logo and Site Title
- Updating Colors
- Changing Typography
- Updating Layouts
Updating Logo and Site Title
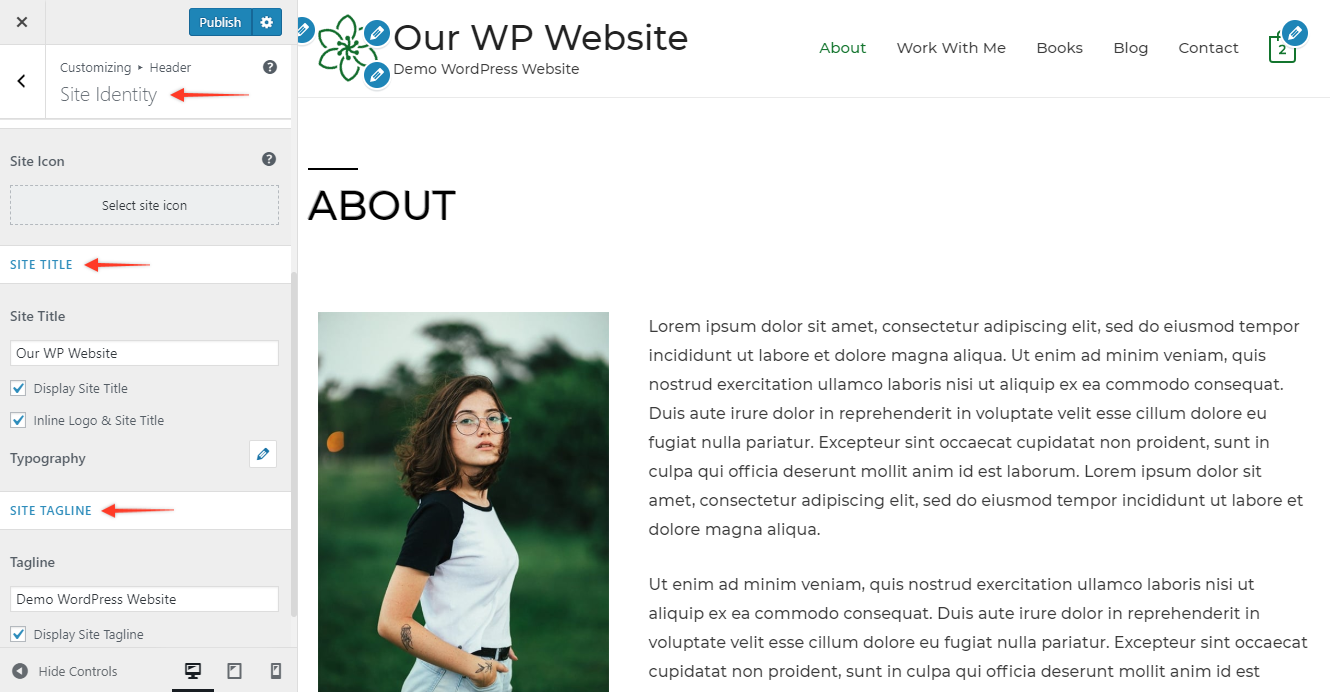
Head over to your WordPress Dashboard. Under Appearance and under Astra Options section – Choose Upload Logo button.
This will take you to the customizer page where you are able to update your logo, your site title and tagline right here.
You can also see a live preview as you are making these changes.
Once you are satisfied, hit the blue Publish button and the changes will be updated live on your site.
Updating Colors
You might already have brand guidelines for your business, and you want to make sure that your website is consistent is with those brand colors.
Head over to your WordPress Dashboard. Under Appearance and under Astra Options section – Choose “Set Colors” button.

You will see this screen, and you will notice a list of all the different places that you can control or update the colors on your website.

Take a look at this video which shows all the color changes you are able to make on your website.
In this video, you can see how quickly and easily you can make color changes.
You can also see the changes impact your website – with the help of the live preview.
Once you have made all the color changes to your website using this customizer – make sure to hit the blue button Published to make the changes live.
Changing Typography
You might also have style guidelines, and you might want to use those all across your WordPress website.
With the help of the customizer – you can control the fonts, font size(s) for each and every element of your website.
If you have not already decided on this I would encourage you to read this
Even if you don’t have style guidelines – you can start with some of the defaults that are already included.
Head over to your WordPress Dashboard. Under Appearance and under Astra Options section – Choose “Customize Options”.
You will notice all the places that you can make changes.
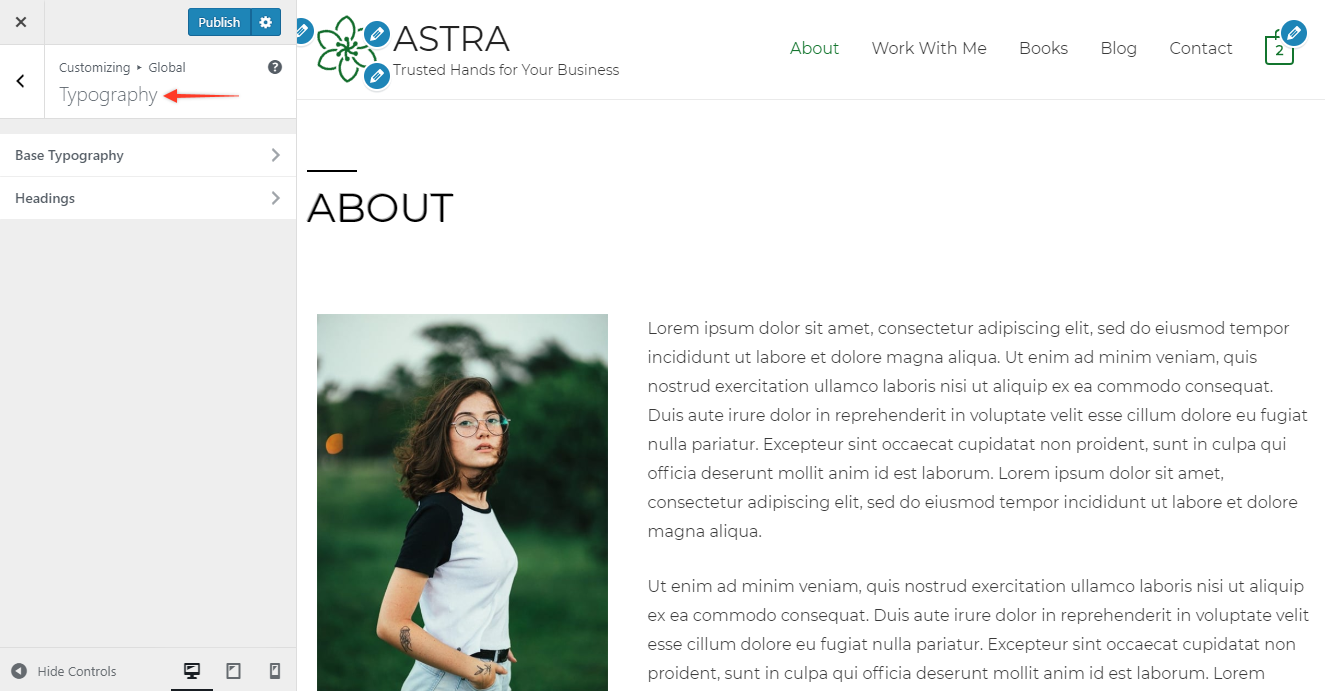
Take a look at this video – it shows you some of the typography changes you can make using astra customizer.
Once you have made all the changes to the fonts for the typography of different sections – make sure to hit the blue button Published to make the changes live.
Updating Layouts
Head over to your WordPress Dashboard. Under Appearance and under Astra Options section – Choose Choose Layout Options

You can see all the available options to update the look-and-feel of your WordPress website.
You have control over how the various elements of your site (header, footer, blogs,etc.) can eventually look
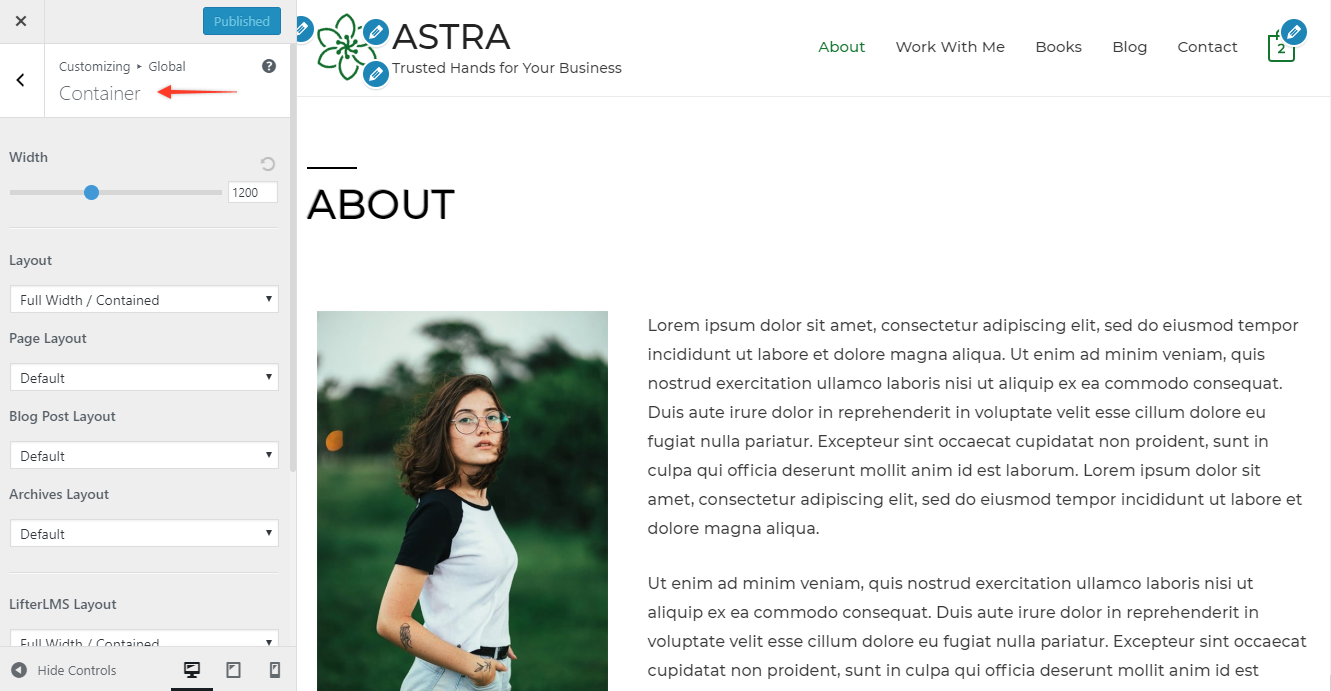
Take a look at this video – it shows you how easy it is to make changes to your Header.
You are able to play around with a few options, and like always you can see the live preview.
Once you have made all the changes to the layouts of different sections – make sure to hit the blue button Published to make the changes live.
Step #8: Update your WordPress settings
Once you have made all the front-end changes as discussed in the previous section, let’s look at some more settings that you need to make.
You have a few settings here to update:
- General Settings
- Writing
- Reading
- Discussion
- Permalinks
- Privacy
Let’s quickly go through them, and also learn how to make the necessary changes.
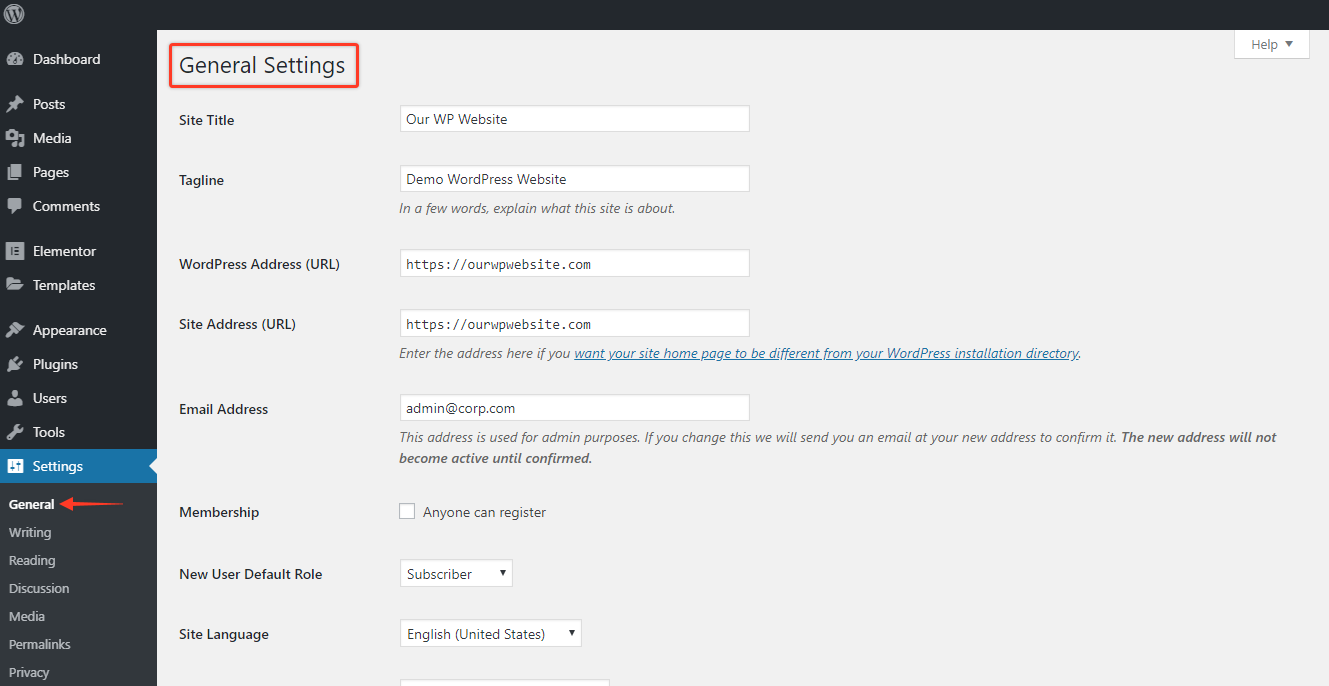
General Settings
Head over to your WordPress Dashboard.
Under Settings choose General Settings
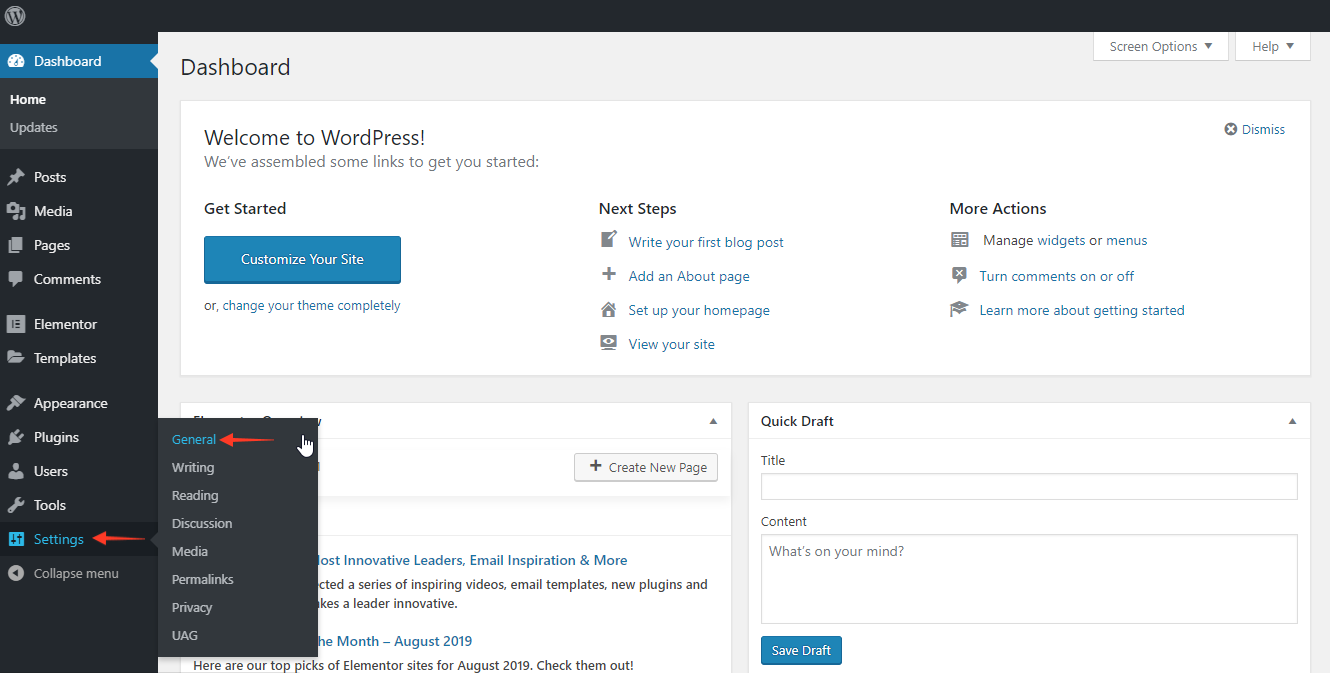
This is where you set some roles and rules on your website.
For example, the default time zone, date format, language, etc.
In addition, you can also set up how you want visitors to register on your website.
Since we have already changed the Site Title and Tagline using the Astra Customizer – you can see that it has already been updated here.
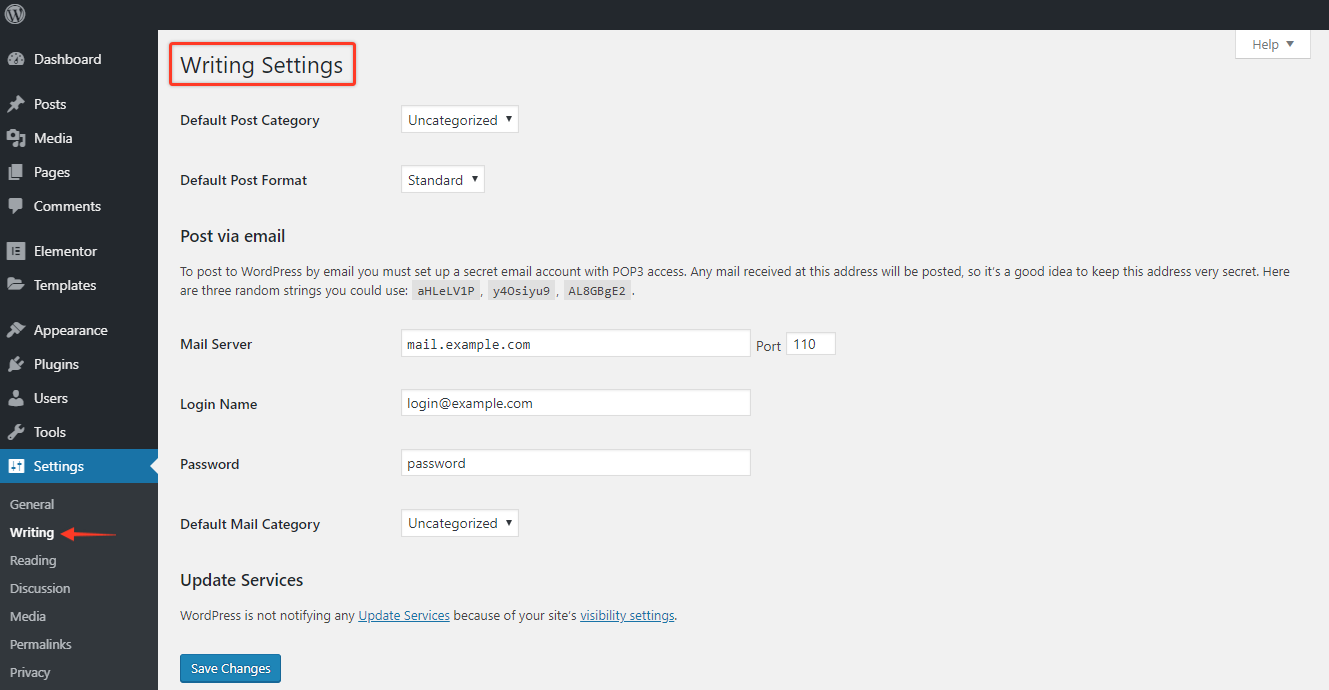
Writing Settings
Next, in the Writing section – you will notice some of the default settings for your default Post Category and Post Format.
You don’t necessarily need to update this today during your initial WordPress website setup.
As you start creating blog posts – you can update this format type.
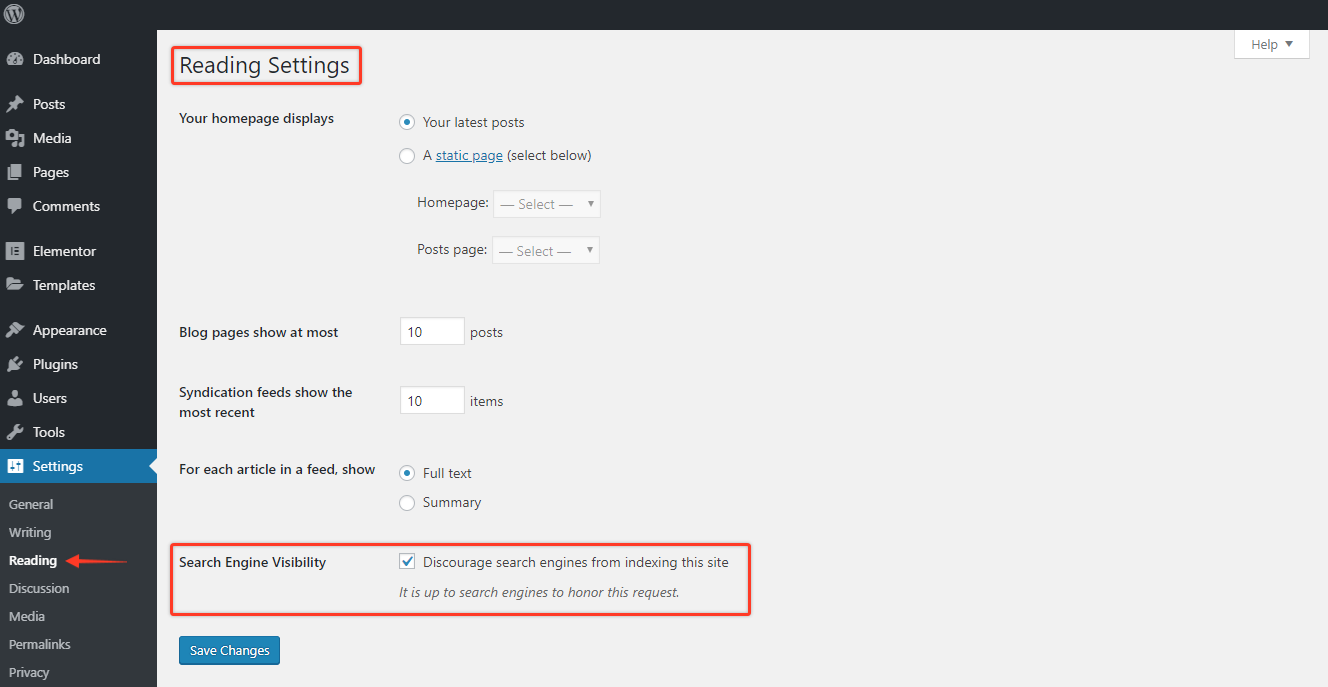
Reading Settings
In the Reading Settings, you can set up how all your posts or pages will be displayed.
This is what your readers will see when they visit your website.
You can choose what you want to display on the Home Page when they first visit.
Do you want to show a particular page, blog posts or the home page? You can set that up here.
For today, you can leave these settings unchanged.
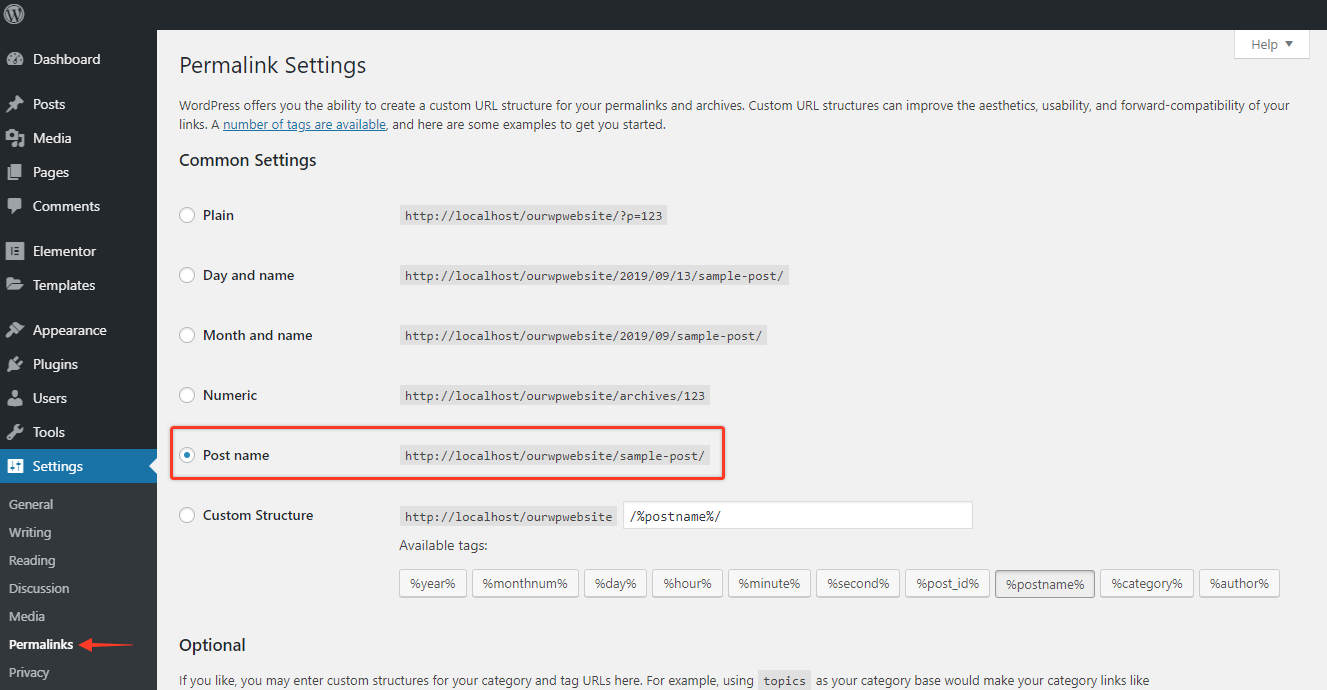
Here is another default setting that you can customize – your site’s permalinks.
A Permalink is the “permanent link” of your posts and pages. This is the format that shows up when someone visits a particular page or post on your website.
If you are not a news site, and you are not relying on timely content – then the best recommended format would the “Post Name” option as highlighted in the image below.
Once selected, this will customize each new page or post as you are creating them. You do have the choice to customize the URL of each page as you are creating them.
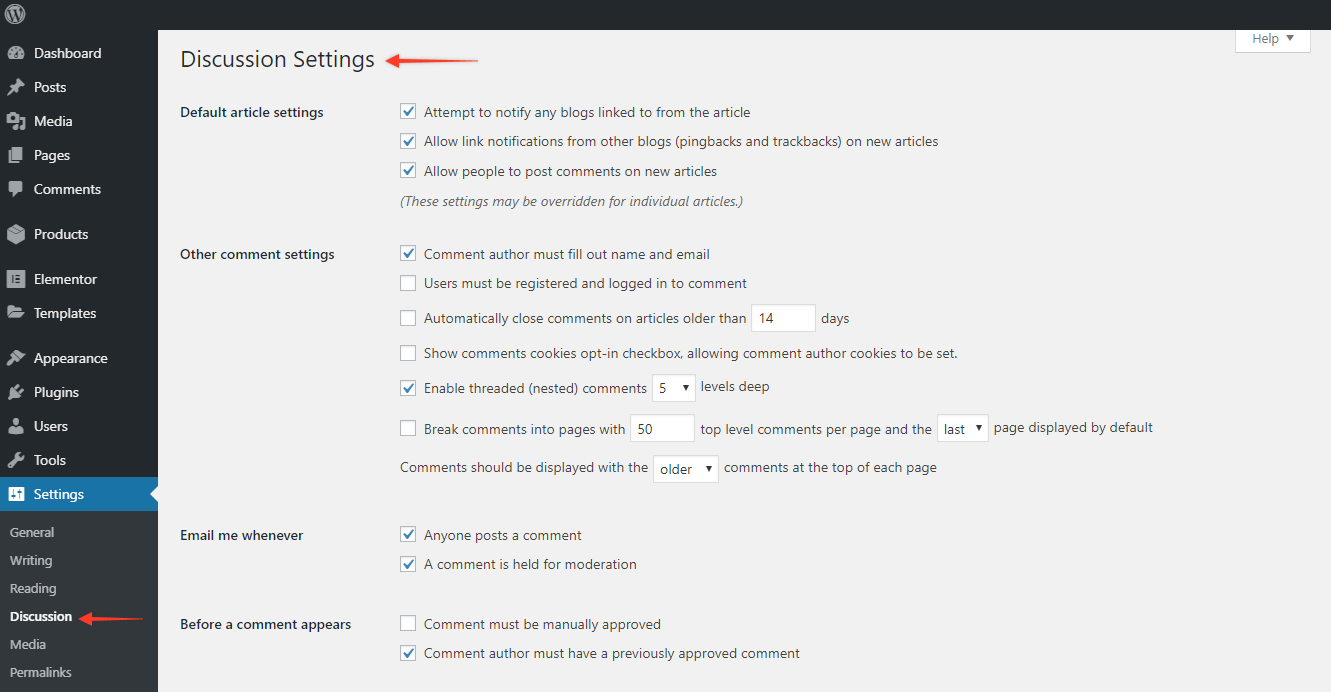
Discussion Settings
About 20% of the content on WordPress sites comes from the comments section.
Comments are how your readers interact with your articles, pages, etc..
There are many reasons to keep comments turned on on your website.
The primary reason is that it is an effective way to communicate with your readers.
Under the Discussions Settings, you can set how you want to display and moderate comments.
Let’s leave these settings as the defaults for now (as you can see in the image below).
You can come back and change them in the future.
Privacy Settings
In a post-GDPR world – privacy is on everyone’s mind.
As a website owner, this is not something you should ignore as well. Why not start your website journey with minimal headaches?
Thankfully, WordPress provides you a template that you can build on.
Head over to your WordPress Dashboard.
Under Settings choose Privacy.
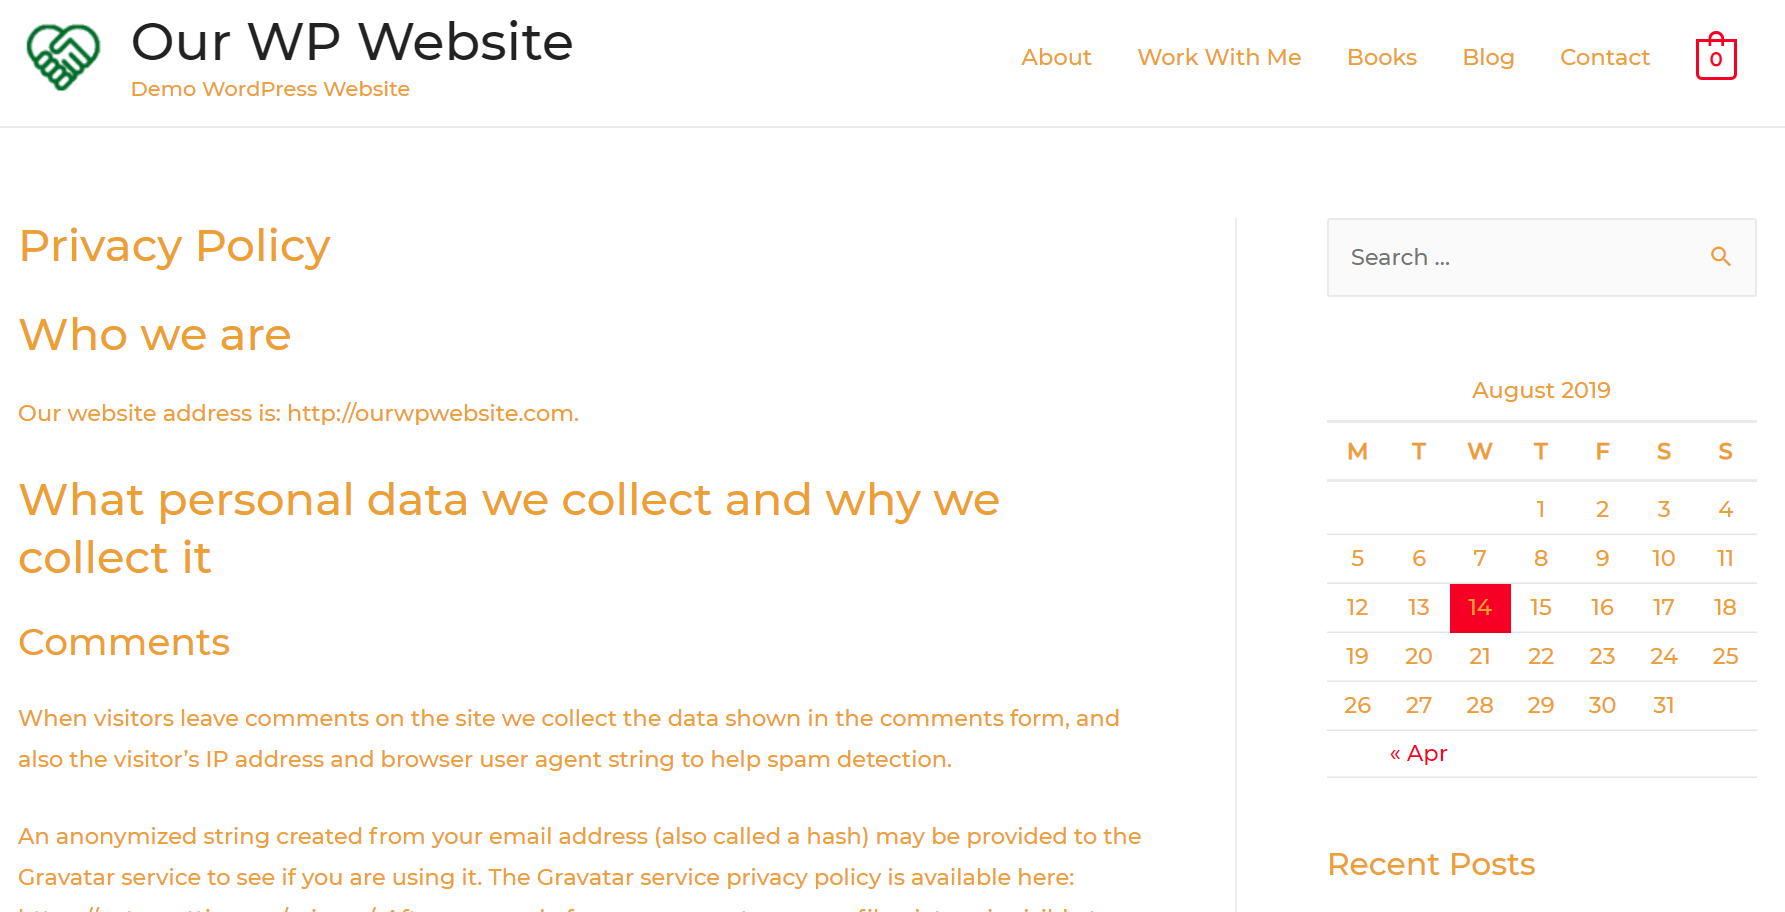
Next, click the Preview button to see the current privacy policy.

This is the default “Privacy Policy” that comes pre-built in your template.
You have the flexibility to make changes to your policy based on your business, industry or region.
Additional Questions – What is the difference between page a post?
So far, i have shown you how to update page layouts, blog post layouts, etc.
To clarify any doubts you have – page(s) and post(s) are different in terms of their purpose and also how they are displayed on your website.
A Post is timely and usually has a date associated with it, and have a public author.
A Page on the other end is for static and timeless content.
It doesn’t display a public author or an associated date.
Choosing whether to have a blog and posts is totally up to. It depends on your business.
However, you cannot have a website without having at least a few pages.
Here are the basic pages you must start with for any website:
- A Home Page
- An About us Page
- A Contact us Page
- A Privacy Policy Page (which we have covered above)
Step #9: Update your menus and widgets
What are Menus, and how to update them?
You want to make it easier for your visitors to find information on your website, right?
Here’s where Menus are effective and they are widely used in most websites.
In most cases, they show up in the header (top navigation) of your website.
By default, the Astra themes come with default menus.
You can customize the names of the menu as well as how they are displayed.
Head over to your WordPress Dashboard. Under Appearance and choose “Customize”.
It will then display all the available Menus.
For the website that we are building in this example, there is only a Main Menu.
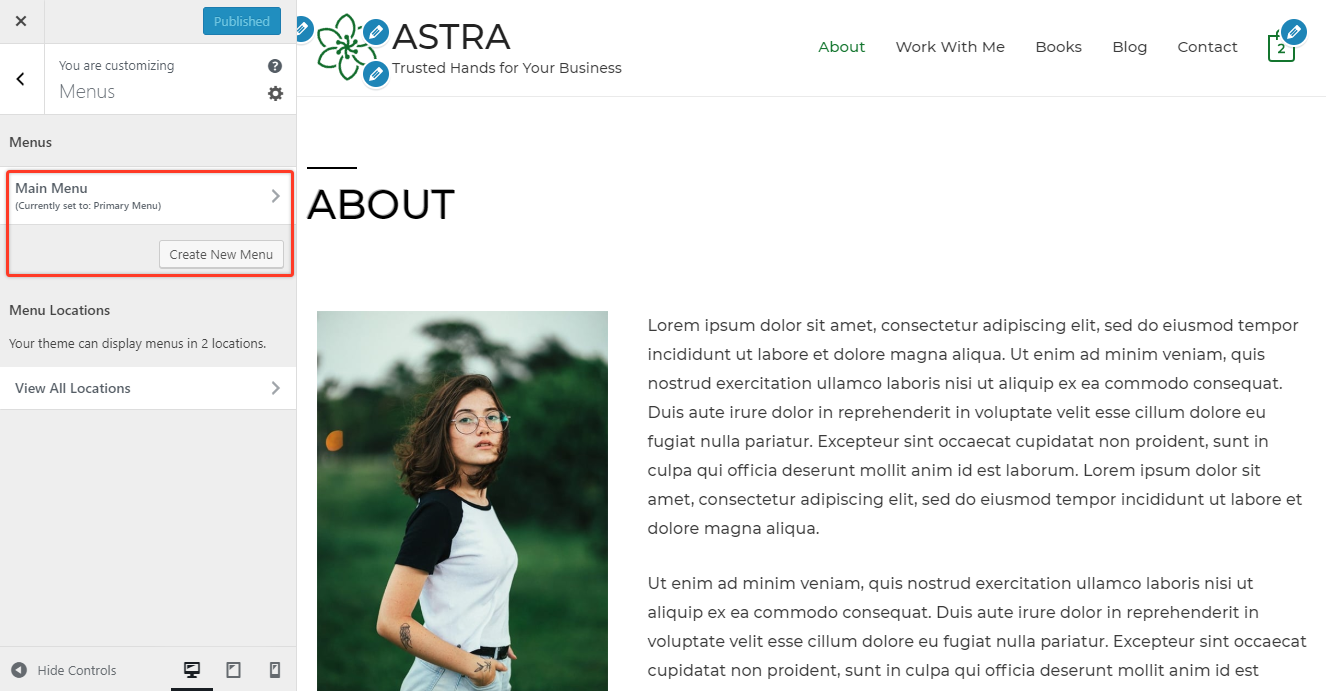
Click Main Menu and then it displays all the default items in the current menu.
You have the option to make changes to the menu right from this screen.

You can also make changes to the position of the Menus by using the Reorder option.
In the same screen – you are also able to add additional menu items.

The goal of optimizing the Menu bar is to make it simpler for your visitors to find information on your website.
What are Widgets, and how to update them?
Have you visited a particular website and you notice that they have some elements on the sidebar? It’s either:
- A Search Bar
- A specific call-to-action
- A list of all their social media
- A list of recent posts
This could be set up using Widgets, and it allows you to customize how the sidebar looks like.
The default WordPress widgets are sufficient for many sites.
However, you will notice additional options based on the theme you have installed.
Head over to your WordPress Dashboard.
Under Appearance and choose “Widgets”.
You will notice the list of current widgets on the right-hand side under “Main Sidebar”

On the left-hand side, there is a slew of options, and you can simply drag and drop the ones that you feel are relevant to the Main Sidebar
Take a look at this video on how to add new widgets to your existing sidebar.
It is also simple to customize any of the existing widgets.
Click on any of the widgets.
We will choose the Recent Posts widget, and you will notice that it expands.
You can choose how many posts you want to display at any time, and also if you want to display the published dates or not.

Step #10: Install Plugins
WordPress allows you to quickly set up a website using it’s free CMS.
However, there are limitations of what you can do out-of-the-box.
To fill the gaps with functionalities – WordPress offers a library of plugins.
A plugin is a software (some free, some paid) that you can install on your WordPress website to enhance the functionality of your site.
It is estimated there are over 55000 plugins to choose from the WordPress library.
We recommend that you start with a few plugins to when launching your WordPress Website.
We have vetted and compiled a small list of must-have plugins you need to have on your website today.
This should at least get you started.
You are free to explore and choose more plugins as you grow your website, and also based on your goals and requirements.
How to install plugins?
You can install any of the plugins recommended by us
To install a plugin, head over to the WordPress Dashboard. Click on Plugins, and this will display the list of your existing plugins.
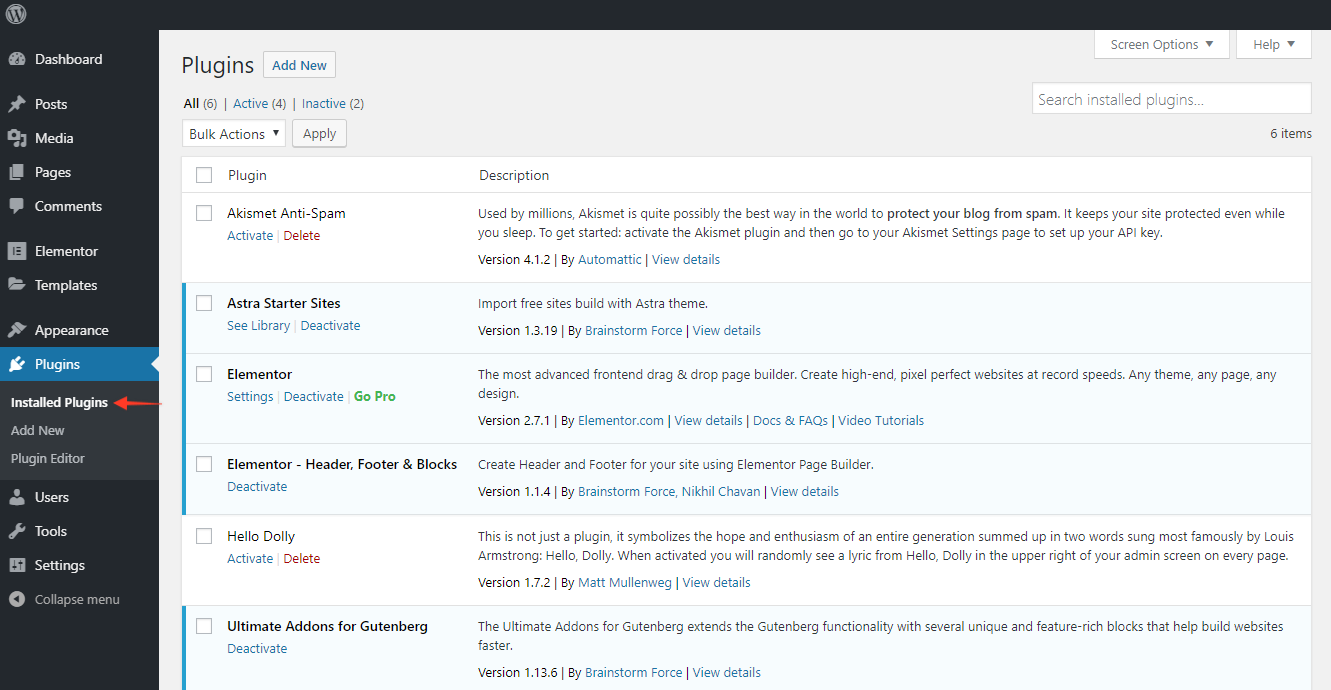
To search for and add new plugins, choose either of the two Add New buttons.
One is just below the Installed Plugins on the left sidebar.
Get plugins that are useful to your business/website.
Congratulations your site is now live and ready to be viewed..
Content Sources:
- Namecheap.com
- WordPress.org
- Wikipedia.com
- Wpastra.com
Comments
Post a Comment